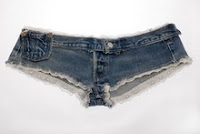
An easy, free place, to explore and resource all things related to maintaining, renewing and re-cycling, old, worn jeans with tender loving care.


Saturday, May 29, 2010

DIY cropped, denim joggers


If you have a pair of naft jeans with no personality and you love denim and love the ease of joggers, then why not, follow your love – and crop and recycle those old jeans into something cozy, comfortable and cool to wear?  These cropped joggers are easy to make - and quickly become a favorite.

Level - some sewing (takes an hour) and knitting (another hour) experience is needed. If you are not a knitter cut the cuffs from a cast-off sweatshirt.

Materials:
Your cast-off jean
Ochre thread
4' x 5/8" wide, pink and white striped grosgrain ribbon
5' x 1" wide, lime woven braid
Note: Ribbons were chosen with different weaves and colors to create an imaginative mix and the yarns for how they compliment the ribbons and denim.  Follow my lead or rummage through your pile of notions and yarns and do it in another style.
1 skein Debbie Bliss Cotton Denim in Aran, 100% cotton yarn, 50 g/74 yards, color 14503,
1 skein Schachenmayr's Catania, 100% cotton yarn, 50 g / 135 yd, color citron
1 pair size 7 knitting needles
1 knitting sewing needle
3" carabiner
+ your basic sewing and knitting materials
How to Do It - Step-by-Step
Cut the Jeans:
Cut your jeans 2" below your knee and zigzag stitch the cut edge.  
Sew the Ribbon Trim:
Cut ½ yard off the lime braid and set aside for the loops.  
With 1/8" overlap, pin the two ribbons together, lengthwise.  
Baste, remove pins and machine zigzag stitch together.
Cut the length in half. Fold back the top edge ½" on one strip, align to the side seam where it joins the waistband and pin along the side seam, to the cuff. Trim any excess ribbon at the cuff. Baste in place, remove pins and zigzag stitch the ribbon around the perimeter. Repeat on the other side seam with the other strip of ribbon. 

Knit the Rib Cuffs:
Knit a pair of 1 x 1 rib cuffs. Directions for Small (Medium, Large) sizes correspond to a finished circumference of 3 ½", 4 ½", 5 ½".
Note: Check that the measurement will fit snug around your calf and adjust as necessary, adding or subtracting stitches in pairs.
With Cotton Denim Aran, cast on 45 (49, 53) stitches.
Row 1 (RS) K1, *p1, k1; repeat from * to end.
Row 2 P1, *k1, p1; repeat from * to end.
These 2 rows form the rib pattern. Repeat these 2 rows for 6 more rows.
Switch to Catania and work 2 rows.
Switch to Cotton Denim and work 2 rows.
Switch to Catania and work 2 rows.
Switch to Cotton Denim and work 2 rows.
Bind off all stitches using Cotton Denim. Cut yarn, leaving a 12" (30.5cm) length. Repeat for the second cuff.

Assemble the Knit Cuff:
Thread the extra yarn length on a knitting sewing needle and matching the stripes, sew up the rib seam on the wrong side. Securely knot all ends so they will not unravel. Repeat for the second cuff.
Attach the Knit Cuffs:
Fold the rib in half and pin the center of the fold to the cuff side seam. Align the seam of the rib cuff to the inside seam of the denim cuff. Stretch the ribbing, easing the knit rib evenly. The rib should overlap the denim ¾". Pin, baste and remove the pins. Hand stitch securely with the ochre thread. Remove basting. Repeat for the other cuff.  Lightly steam the seam.

Attach the Belt Loops:
Cut the remaining lime braid in half. Take one strip, overlap the ends 5/8" and stitch closed to form a continuous loop. Fold it in half. Pin on the front side waistband and fold it over the waistband (like above photo.) Baste, remove pins. Zigzag stitch in a cross as in the photo. Remove basting.
Repeat with the other strip, adding a loop on the back waistband. Hook a key carabineer on a loop, snap on a memento or cell phone – and you're off! Enjoy your comfy, cropped, denim-joggers!

Tuesday, May 25, 2010

DIY Denim Hobo Bag

Awhile ago my cousin was chatting about her beginner sewing adventures. So when I was recently in Portland, we caught up and she pulled out her in-progress denim “hobo bag.”  It certainly is a super solution for a pair of has-been jeans:
 - the legs have been cut off;
- the bottom sewn closed;
- a pair of comfortable denim straps were added, cut from the legs;
- and a cheerful lining is now pinned in place, ready to be stitched.
Thanks to Sandy, her neighborhood's amazing sewing whiz, who not only stitched together the charming patched lining to ensure a touch of polish, but also taught my cuz to pin, cut and sew the denim – including those long, hefty shoulder straps that she proudly pointed out.
I adore the collaboration and the generosity, of sharing sewing skills, patterns, creativity and leftover fabrics, with a true beginner. After further investigation, it seems that Sandy is sharing her knowledge all over the place.  She does all the mending at her local clothing redistribution center so that needy kids can dazzle with their "new" clothes.  And over the years she has taught Girl Scouts, exchange students, as well as her own children, to sew. (In fact, some of her Girl Scouts funded their way to Mexico and Europe by sewing and selling their wares.) She herself, learned to sew from sitting on her mother’s knee, Girls Scouts and Home Ec, back when it existed in schools.
Sewing stories are also stories about life!
Hmm…have you any sewing or mending adventures to share?

Monday, May 24, 2010

Jeans come in all sizes

Visiting dear friends ...
a mom, her daughter and growing son,
all in jeans,
every which way,
even in need of a touch up repair or two.

Saturday, May 15, 2010

How to turn your wide-legged jeans into to skinny-jeans

Guest post by the wonderful Mudnessa
(it was first spotted at the Greenists, an awesome place for all things green.)
Mudnessa writes:
I recently took an older pair of wide-legged jeans and made them into skinny jeans. Let me first state that I am a novice sewer, so if you have a sewing machine and have ever successfully used it, you should be able to accomplish this yourself. I did this for numerous reasons, mostly because I hate shopping for jeans. I also hate spending a ton of money on a pair and having to go home and basically deconstruct them to make them fit to my liking.

Step one: Turn the pair of jeans inside out and put them on.
Step two: Pin the inside seam to desired skinniness. When you do this, make sure the outside seam is on the outside of your leg evenly. Don’t make them too tight; you will need to be able to get your foot through the skinniest part. You will also probably want a bit of wiggle room so you can breathe and function in them. You may want to elicit the help of a friend with the pinning. I had to do this step twice because I was alone and the first time the pins turned out very crooked and there was no way I could sew a functioning seam.
Step three: Take the jeans off while still pinned to make sure you can get your feet out and they aren’t too tight; be careful not to stick yourself. I was still not comfortable with the pin line I had and was unsure I could sew a good seam. I put the jeans back on and to make it easier to sew a straight seam, I grabbed some tailors chalk and marked a line as straight as I could just inside the pin line, closer to my leg than the pin line.
Step four: Take the jeans to your sewing machine and sew them up. I sewed outside the chalk like, closer to the original inside seam, making them looser than the chalk line since I made the chalk line inside the pins. I started my seam on top of the existing seam a bit higher than my marked line so I wouldn’t end up with an odd bunch or dart, starting with a backstitch of course so it wouldn’t unravel. I continued the seam at an angle, meeting up with my chalk line and used it as an outside guide all the way to the bottom and ended it with a backstitch as well.
Step five: Cut off excess material. You may want to try them on first and make sure they fit to your liking before you cut them. I then needed to hem the bottoms since I usually wear heels; they were quite long and gathering a bit too much around my ankles.
Enjoy your new skinny jeans. It’s like having a new pair of jeans without the hassle of hours of trying on pants, only to be disappointed, and also without the dent in your wallet.

Monday, May 10, 2010

Jeanne's Jeans

When a mixed media artist starts to mend her husband’s jeans …
her artistic skills, vision and sensitivity are totally inspiring.
The jeans are a work in progress.
More holes, more repairs. 
I so look forward to her future postings.
 Thank you Jeanne Williamson for allowing me to post your incredible images!

Visit Jeanne's blog here to discover her jean story.

Friday, May 7, 2010

Basic 101 of jean repair

cat and mouse – a mending technique to cunningly patch jeans
the jean dilemma:
You have a pair of very cool jeans that you love and fit well but suddenly they are disintegrating into an annoying mess of holes. You want to maintain the fashionably distressed look but they desperately need mending.
the cure:
Mend them by integrating your stitches and handwork with the worn denim texture. To make them durable and chic you will fuse and patch on the inside and then re-enforce with stitching in the worn areas.
If you have some general sewing experience you can easily mend your jeans with this technique.
the sewing materials:
Medium weight, white iron-on fusing (enough to generously fit the area you are patching)
Cotton, medium weight fabric for the inside patch (same amount as fusing)
note: Search through your scrap bin for a cotton fabric that reflects the style of the wearer and the jeans. The plaid fabric used in this example is a good unisex option.
Cotton thread that matches your jeans
note: choose a shade that blends with the worn area you will be mending. A single pair of jeans has many different shades. Well matched thread is an important style element.
General sewing materials including: scissors, straight pins, hand sewing needle, sewing machine with a “denim sewing needle”, iron, ironing board, ruler or tape measure, seam ripper.
the sewing steps:
1. With your seam ripper open the side seam from a couple inches below the pocket to a couple inches above the cuff. note: In this way you will be able to easily maneuver around to stitch the patches.
2. Measure the area you want to patch, and cut the fusing to size accordingly. Note: The patched area in the example in the photos is the width of the front leg, from the side seam to the crotch seam. When jeans are quite worn like these it’s more efficient to patch the entire area, to avoid having to frequently make additional patches.
3. Using the cut fusing as your pattern, pin it on top of the plaid cotton. Cut the plaid ½” larger all around the perimeter. (If you happen to have pinking shears then use them.)
4. Turn your jeans inside out and press well the area you will patch, also smoothing and pressing neatly in place any loose denim threads.
5. Working on the inside of your jeans, lay the fusing, glue facing the denim, on the area you will be patching. Steam and press very well so that the fusing is permanently glued and secured in place. Any loose denim threads will also be fused, neatly in place. (above photo)
6. Pin the plaid patch on top of the fusing so the fusing is completely hidden behind the plaid patch. Baste all around, ¼” from the edge. Remove pins. (below photo)
note: the plaid patch will protect the fusing from rubbing loose from the jeans and also be feel more comfortable (a lovable denim characteristic…) than the fusing.
7. Turn your jeans right side out. As in the above photo, any loose denim threads have been glued neatly to the fusing. 
8.  Thread your sewing machine with the denim thread and set at a medium stitch length. Using the basting stitch as a guide, stitch all around the perimeter of the patch.
9. Machine stitch back and forth over every split, hole, exposed white denim threads and terribly worn areas. Sew more or less in parallel rows, and if it is an area that will get quite heavy wear, then re-enforce with zigzag or darning stitches. Sew until you are satisfied with the look and the durability. Your repairs will look like the photo below, quite invisible and blending with the naturally worn shade and coloration of the denim.
10. Pin the side seams together, baste and sew along the original stitching line.
11. Pull all the thread ends to the back and knot well. Remove any basting. Press.
You are finished, and it looks brilliant, perfectly distressed, super cool, and ready for a lot more wear!
(a similar, earlier version of this tutorial is also available here in pdf)